Acoustic Panels - Side walls and cloud position
We can now move on to the next chapter in the construction of my production room. After the corner bass traps were complete it was necessary to take care of the side walls in the early/first reflection zone, so I built several acoustic panels for the side walls and also a couple for use as cloud absorbers hanging down from the ceiling. The acoustic panels are cheap and very simple.
Is important to mention that these acoustic panels are basically very universal. If you decide to treat the room in a simple way this is all you need is to create a several of these panels and place them in the right places - surfaces (walls, ceiling) and corners as well.
The panels consist of three main parts:

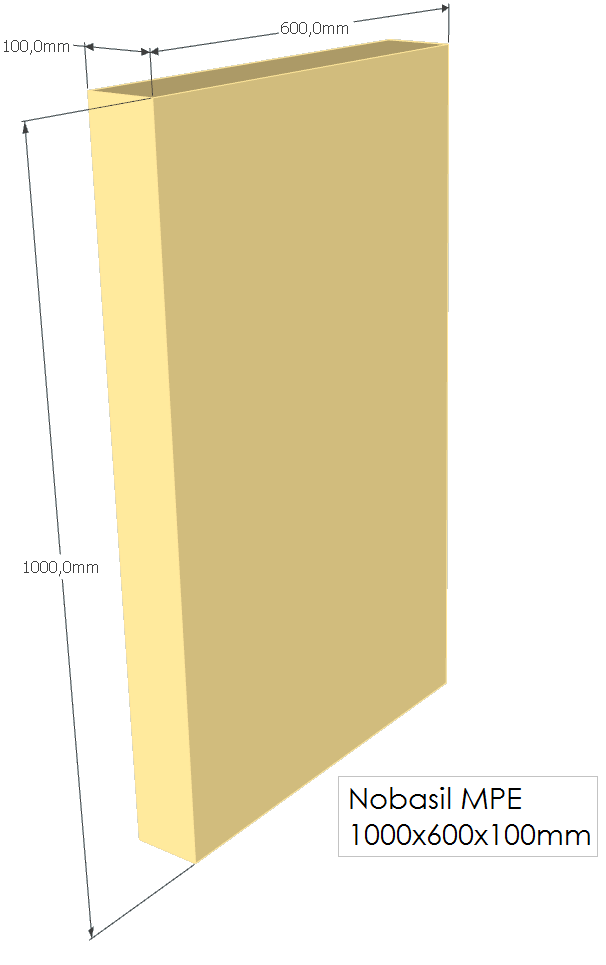
Insulation panels
Because thermal insulation materials have also good sound absorbtion characteristic, they are ideal adept for cheap and simple acoustic solutions. On the market is wide offer. They differ by attributes and the price. Aavailability of certain products depends also on the region in which you live. After short research in my case was the choice Nobasil MPE. Manufactured panels are 1000x600x100mm of dimensions (100mm is thickness). For one acoustic panel is used exactly one pieces of the insulation.
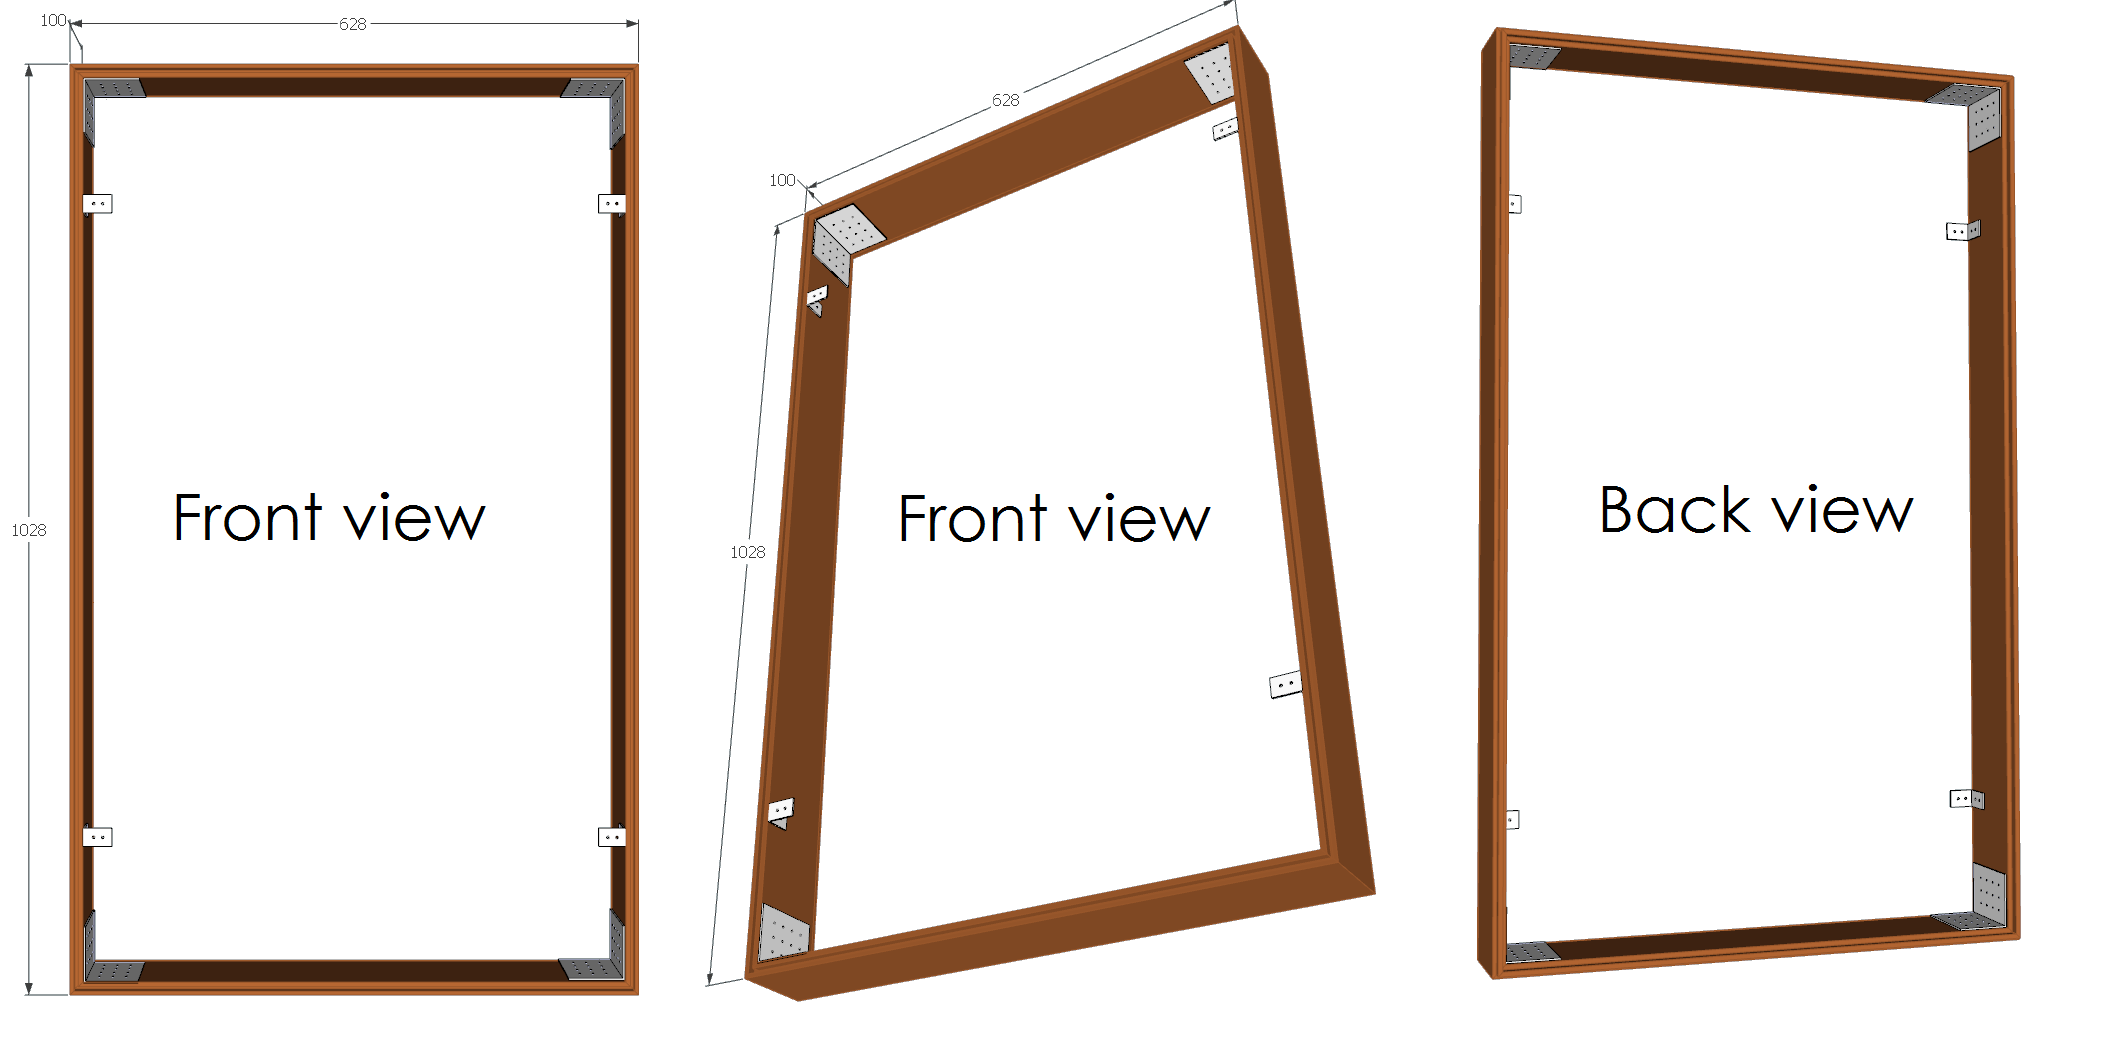
Side frame
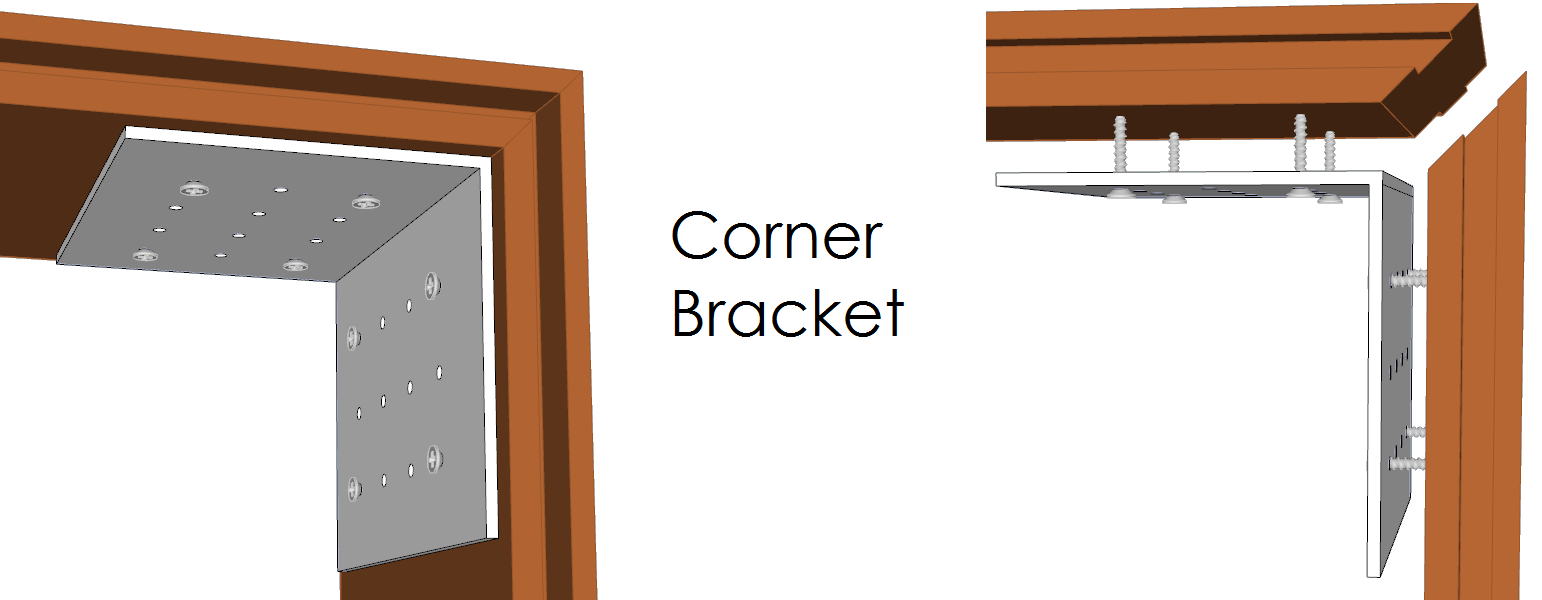
Frame is used to keep insulation on the place and front frame as well. It is a construction of four slats. Two of 1028x14mm and two of 628x14mm dimensions to get rectagle shape. Each slat is on the both ends cutted to 45° angle. Slats hold together using 90° angle brackets and wood screws 3x2,5mm easily available in every common hardware store. I used slats normally used as wood paneling for walls, because they are thin, light and cheap, but have certain contoured profile which prevent to cut it under 90° and join them simply from side by screws through. If you will use slats or some other kind of lath or wood or whatever available for you, something without contours then you can join the slats without cutting of 45° angle and usage of brackets, just to put screws straight from the side as I did in case of construction of front frame for corner bass trap.
On the front side of the frame are also small 90° angle brackets for attachment of the front frame with fabric.
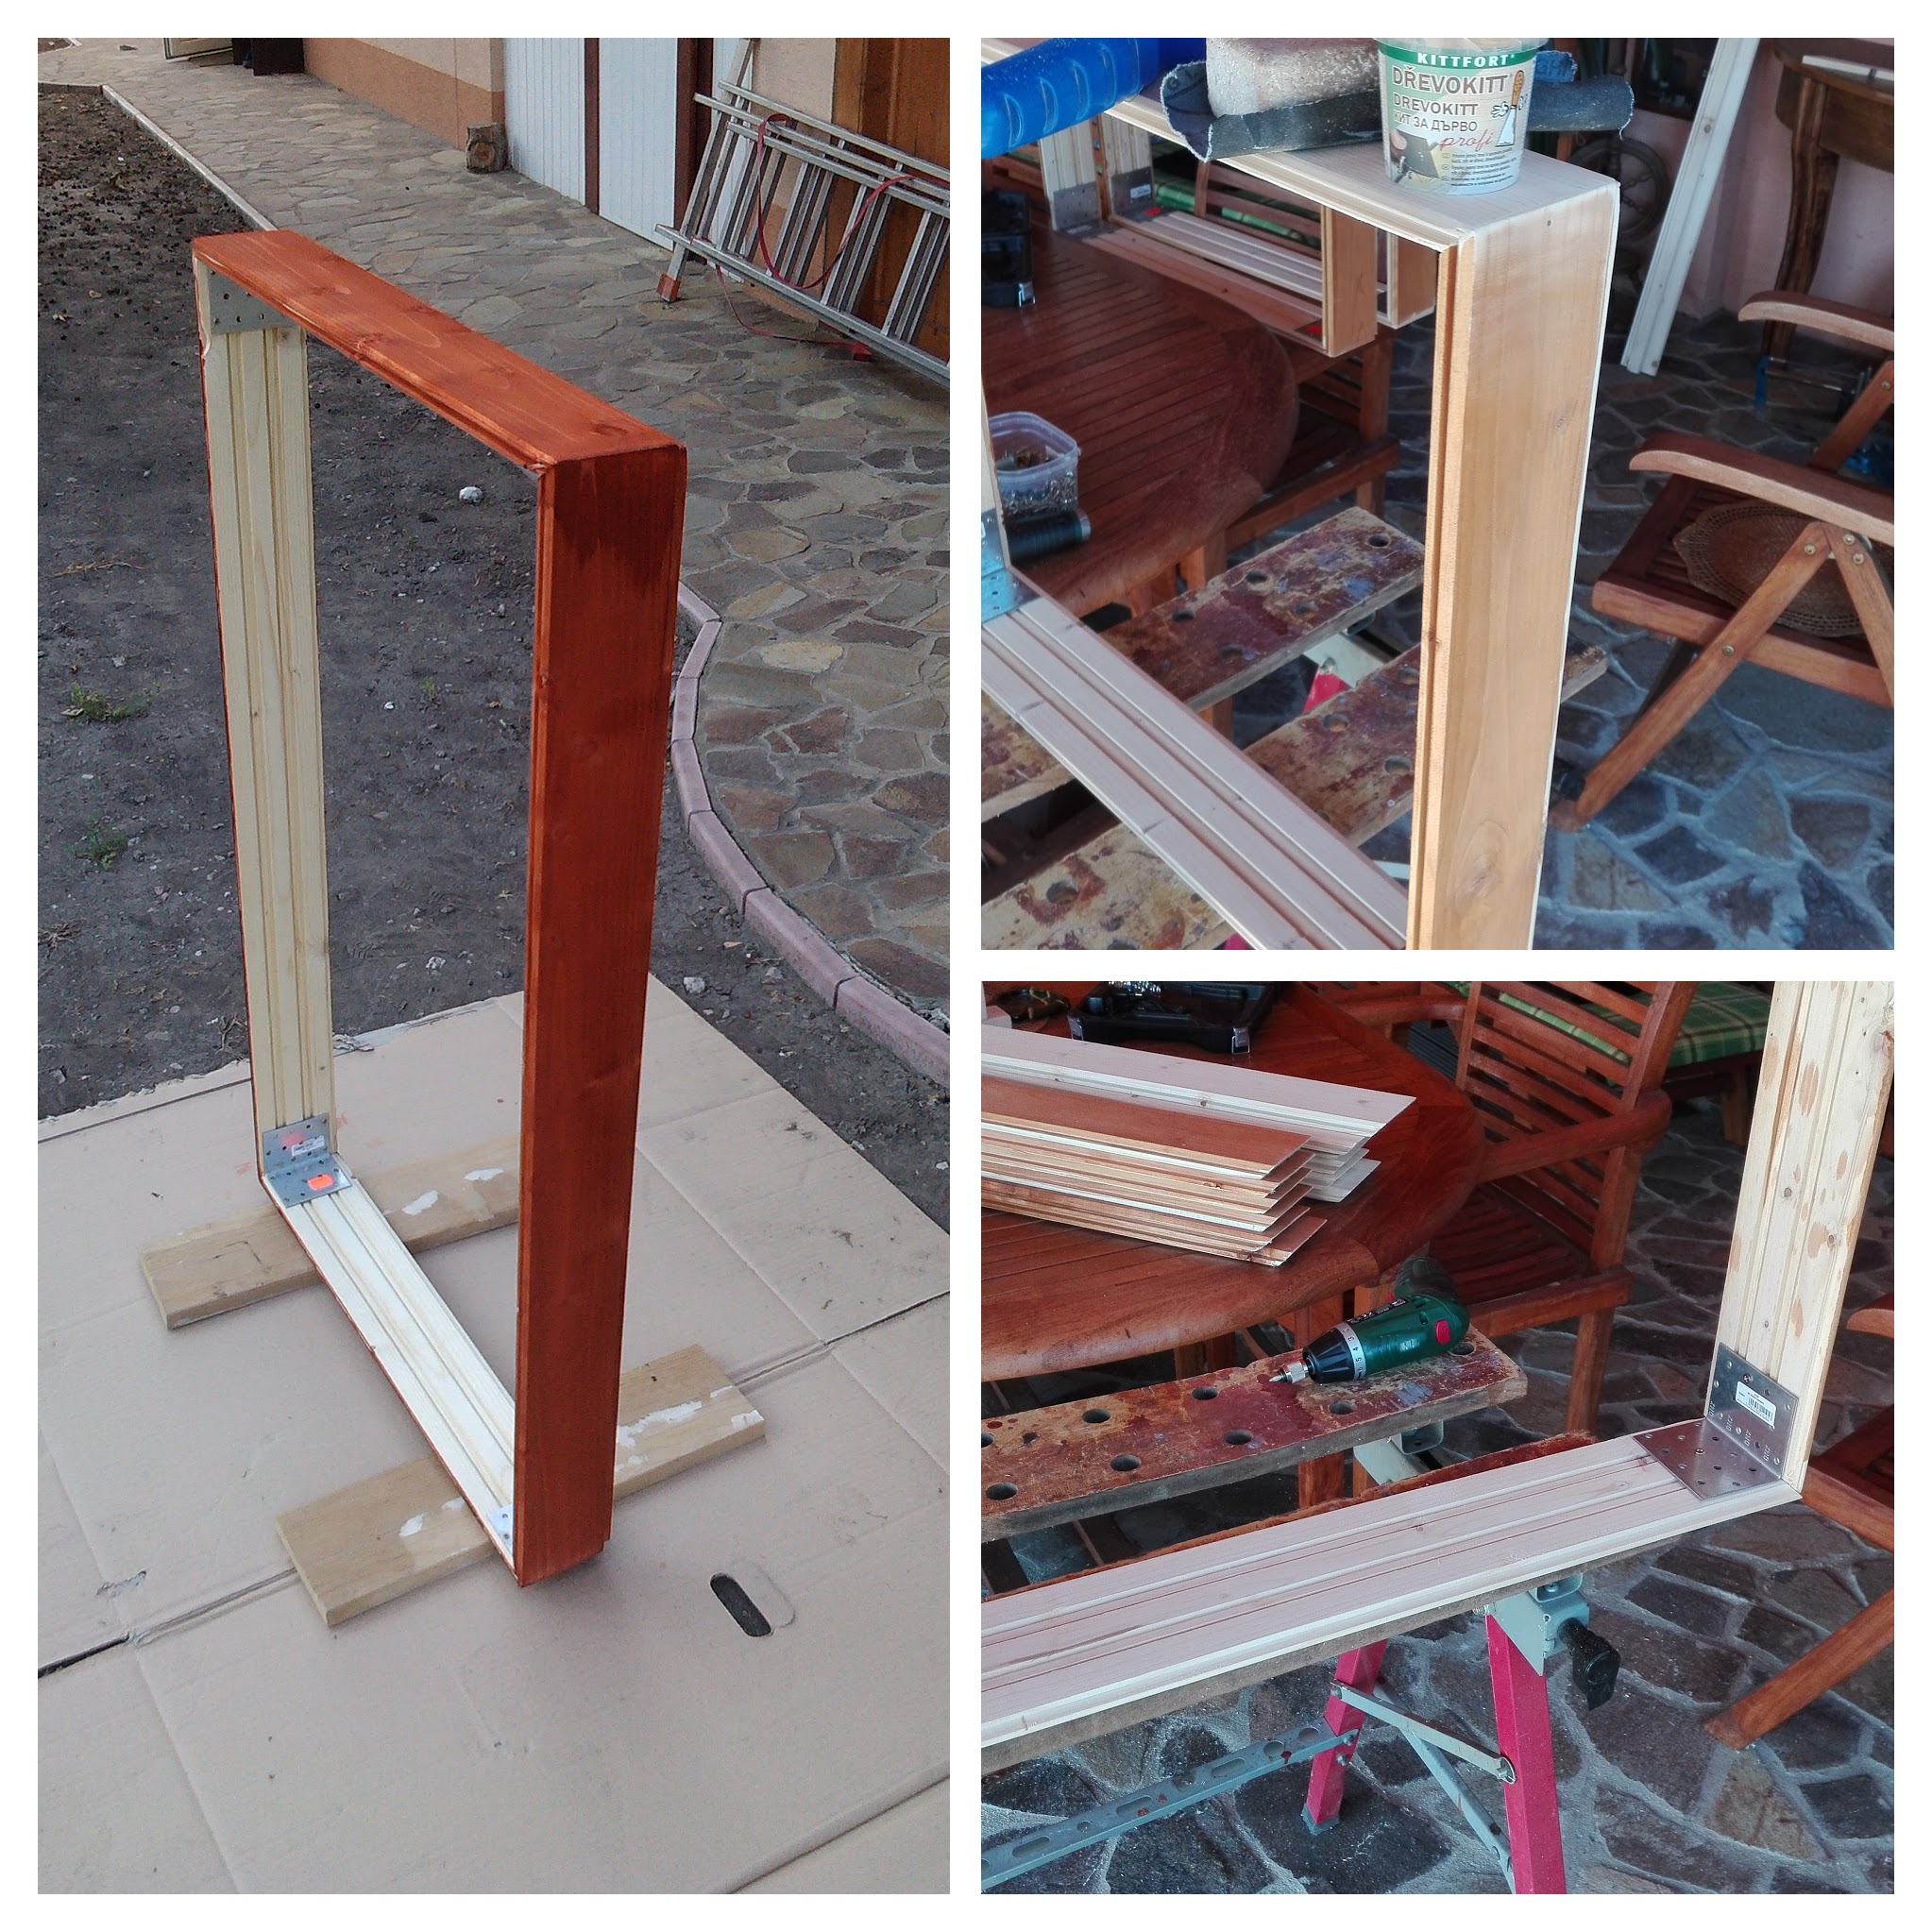
Because cutting of such a light wood pieces on my miter saw was a bit inaccurate or better said rough I had to applied a little bit of wood putty to the gaps in order to get nice smooth cornes, after that was frame sanded, stained and varnished from outer (visible) side.
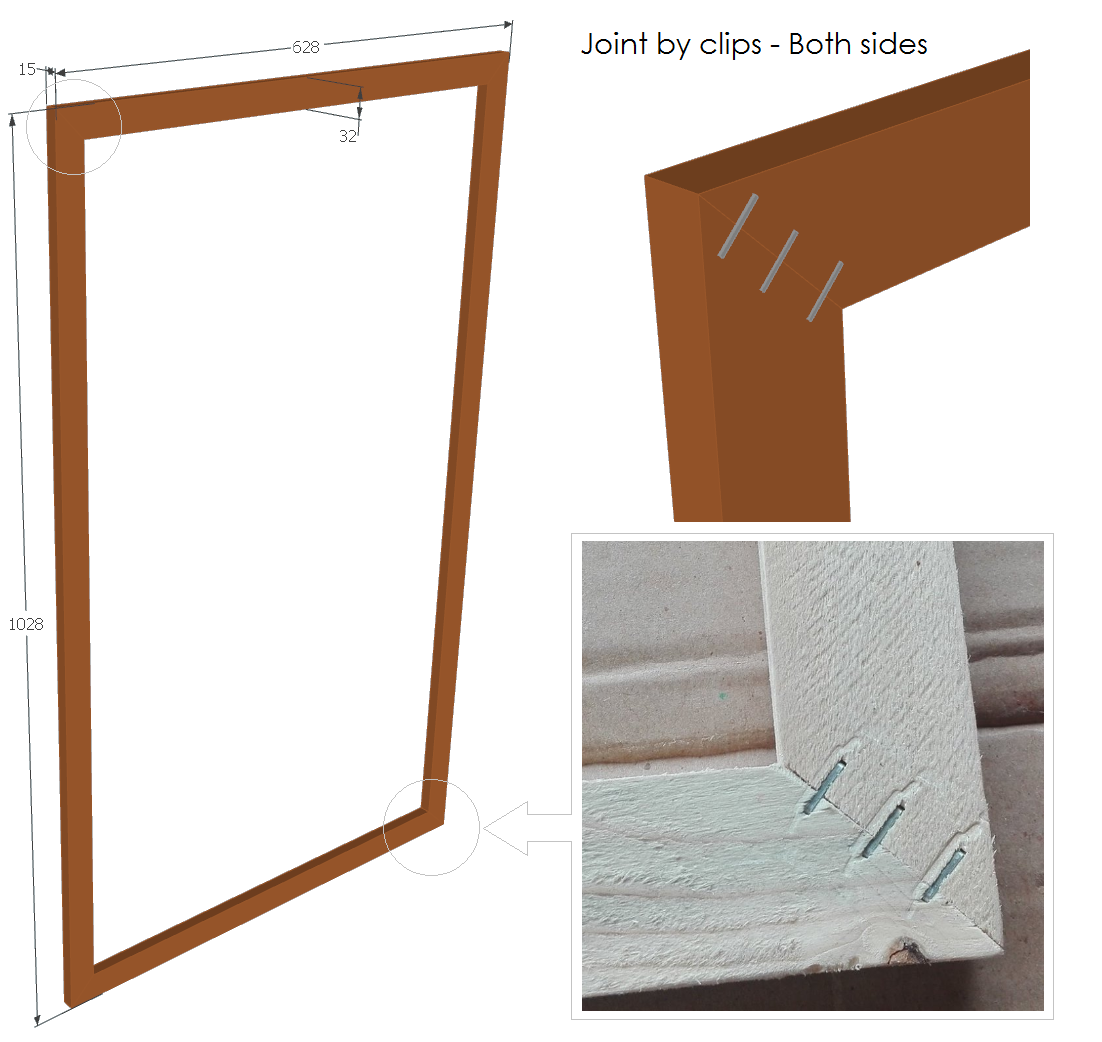
Front frame
Front frame is made by wood lath of 33x15 dimensions. laths are cutted under 45° angle on each end. Particular laths are joined by the stampler clips, three pieces for each corner from both sides. Each wood piece was just lightly sanded, because fabric covers all visible parts there is no need further surface treatment.
Frame is covered by black fabric of 135 g/m2 density, fastened to the frame by electrical stapler on inner side.
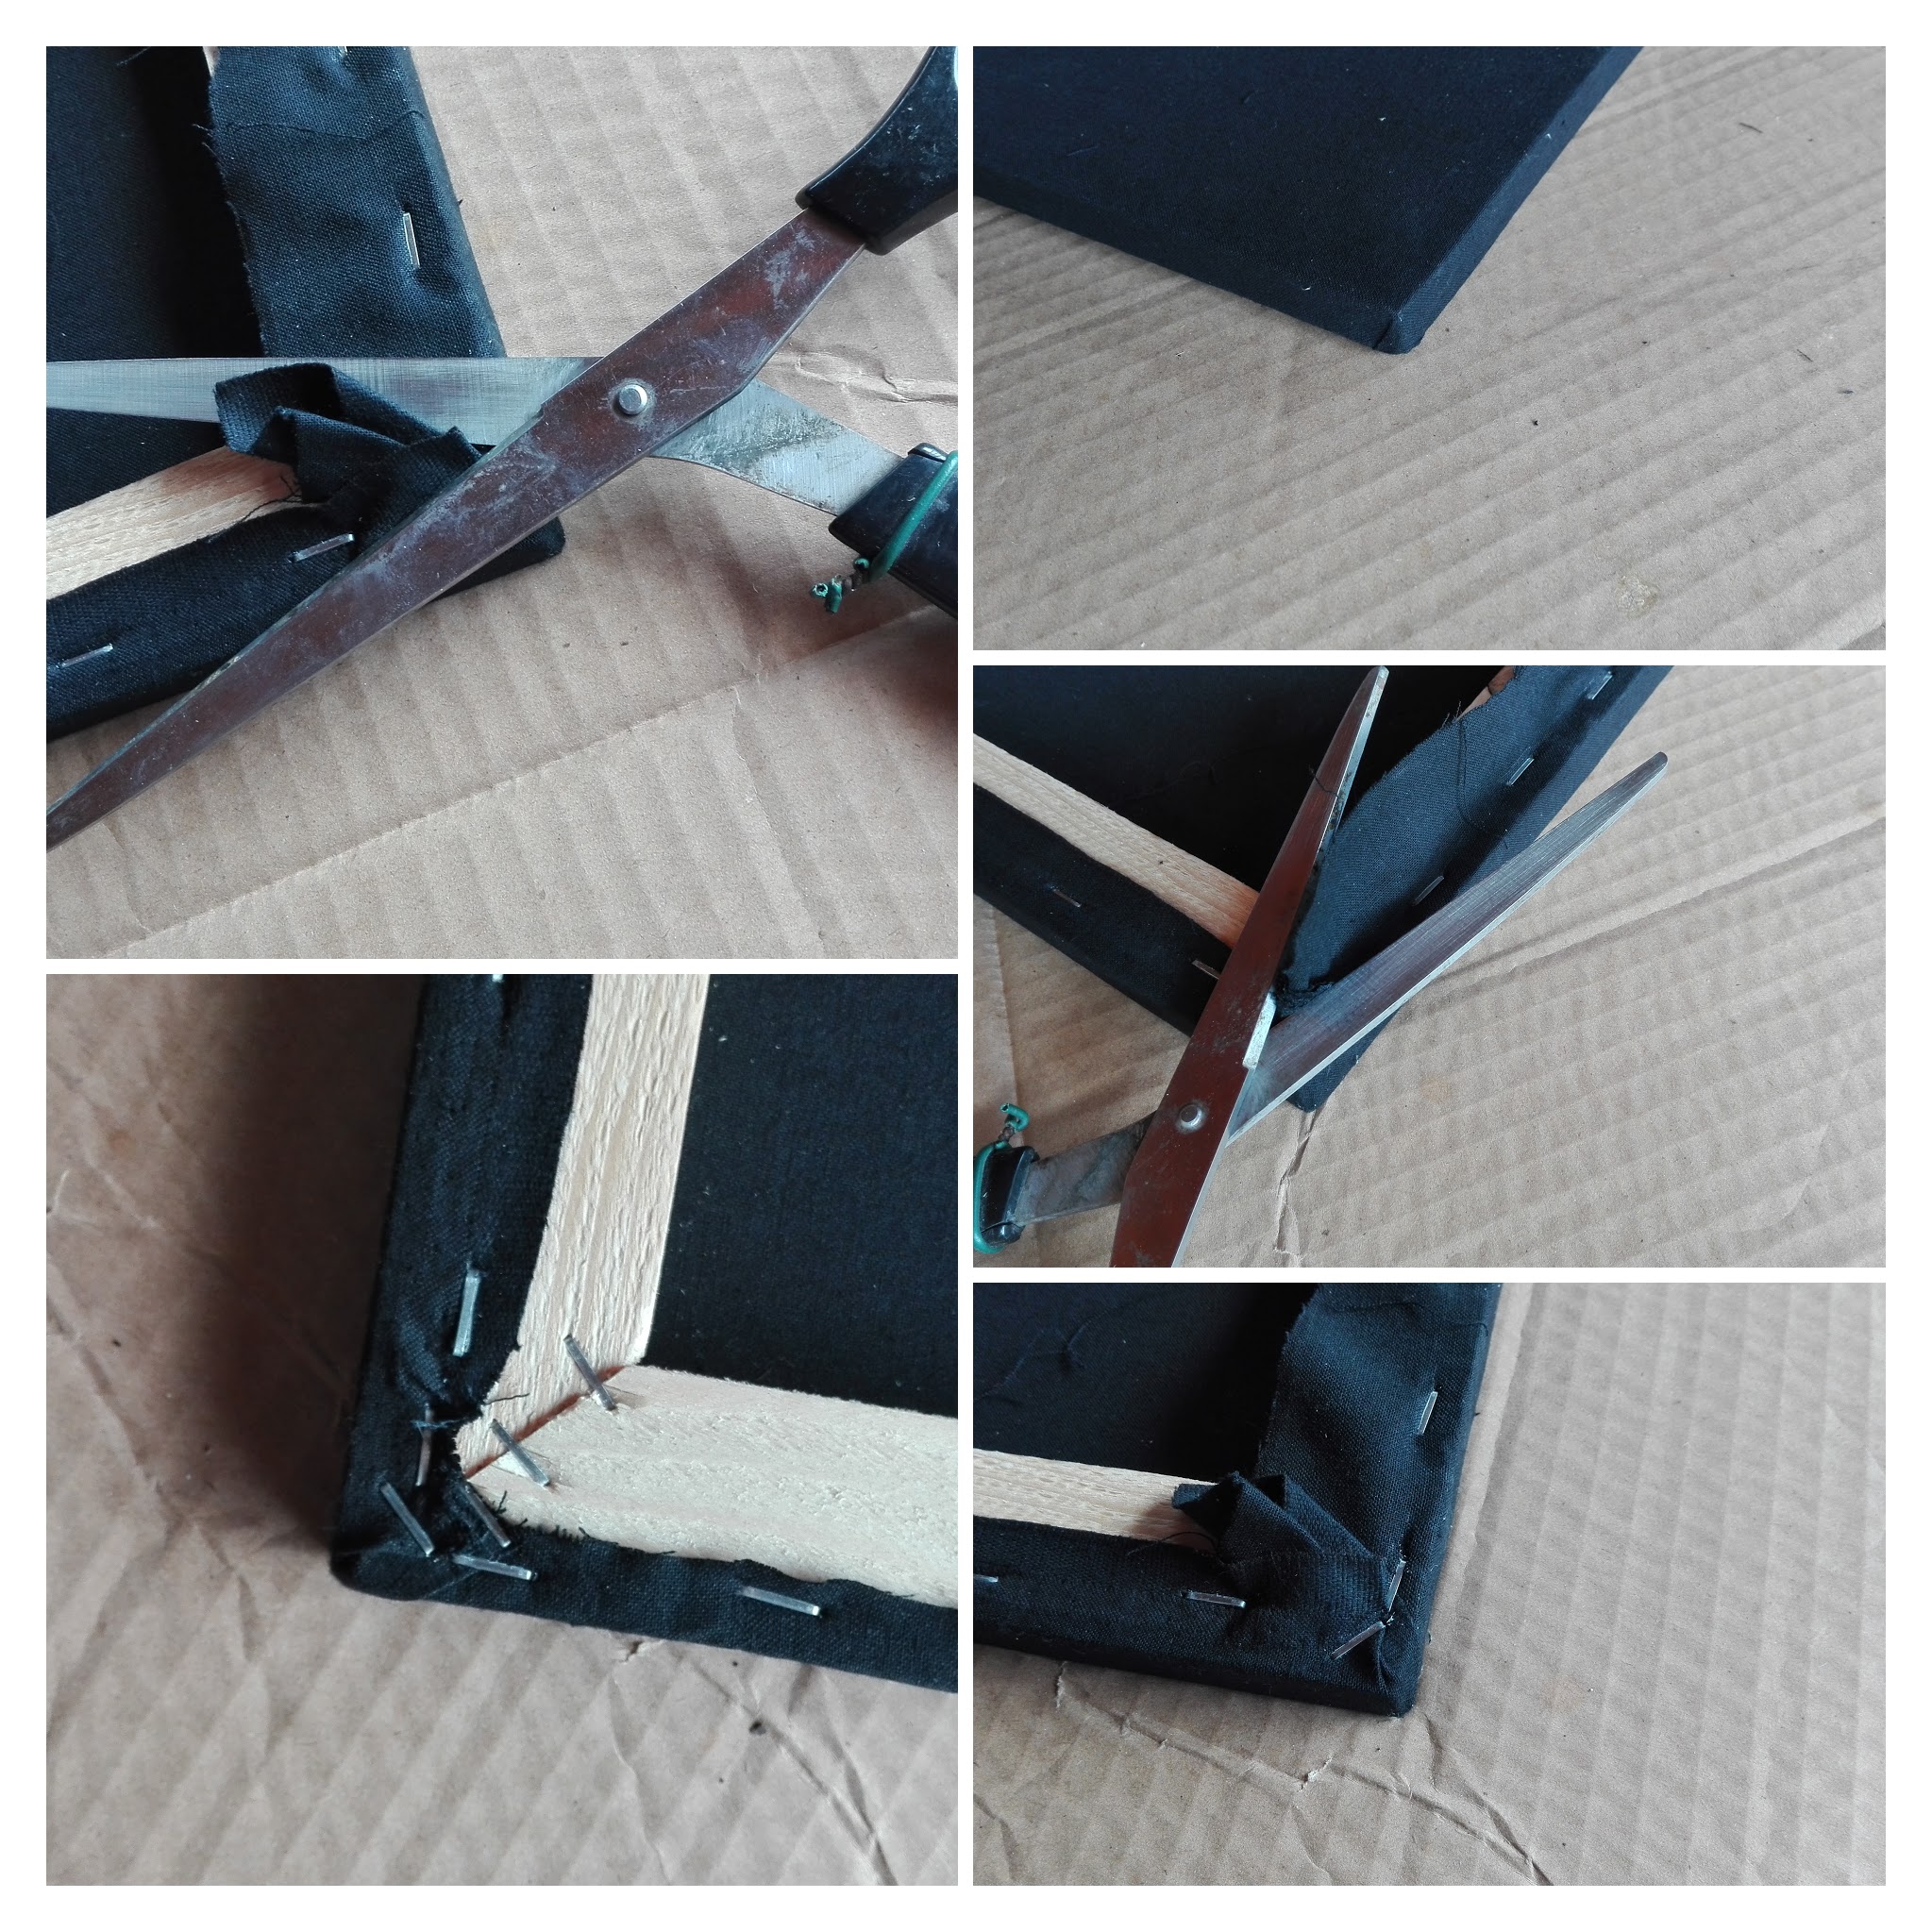

On photos is captured covering of front frame for few acoustic panel of square shape - I created also few acoustic panels with different dimensions in compare with original design because I had some material from previous parts and also it gave me an option to use a bit different placement and more variations. A the end I was satisfied with following configuration:

Square shape panels on the right side wall in top and bottom position. Same panels configuration is placed on the opposite wall, on the left side.