DJ Deck Control - DIY MIDI controller for Djing
After my first attempt at DIY with the conversion of an old DJ mixer to a USB MIDI controller I realised that it would be great to create and have a complete DIY setup. DJ USB MIDI Mixer was complete I had to focus on how to control of the virtual DJ decks in TRAKTOR (or whatever DJ software you use like SERATO or MIXXX), that's how I started the journey of my own DIY DJ Deck MIDI controller.
Functionality & MIDI mapping
Particular control items and its functions have been designed regard to my needs and experiences with TRAKTOR SCRATCH PRO 2, but is no problem to remap each item to any other DJ software.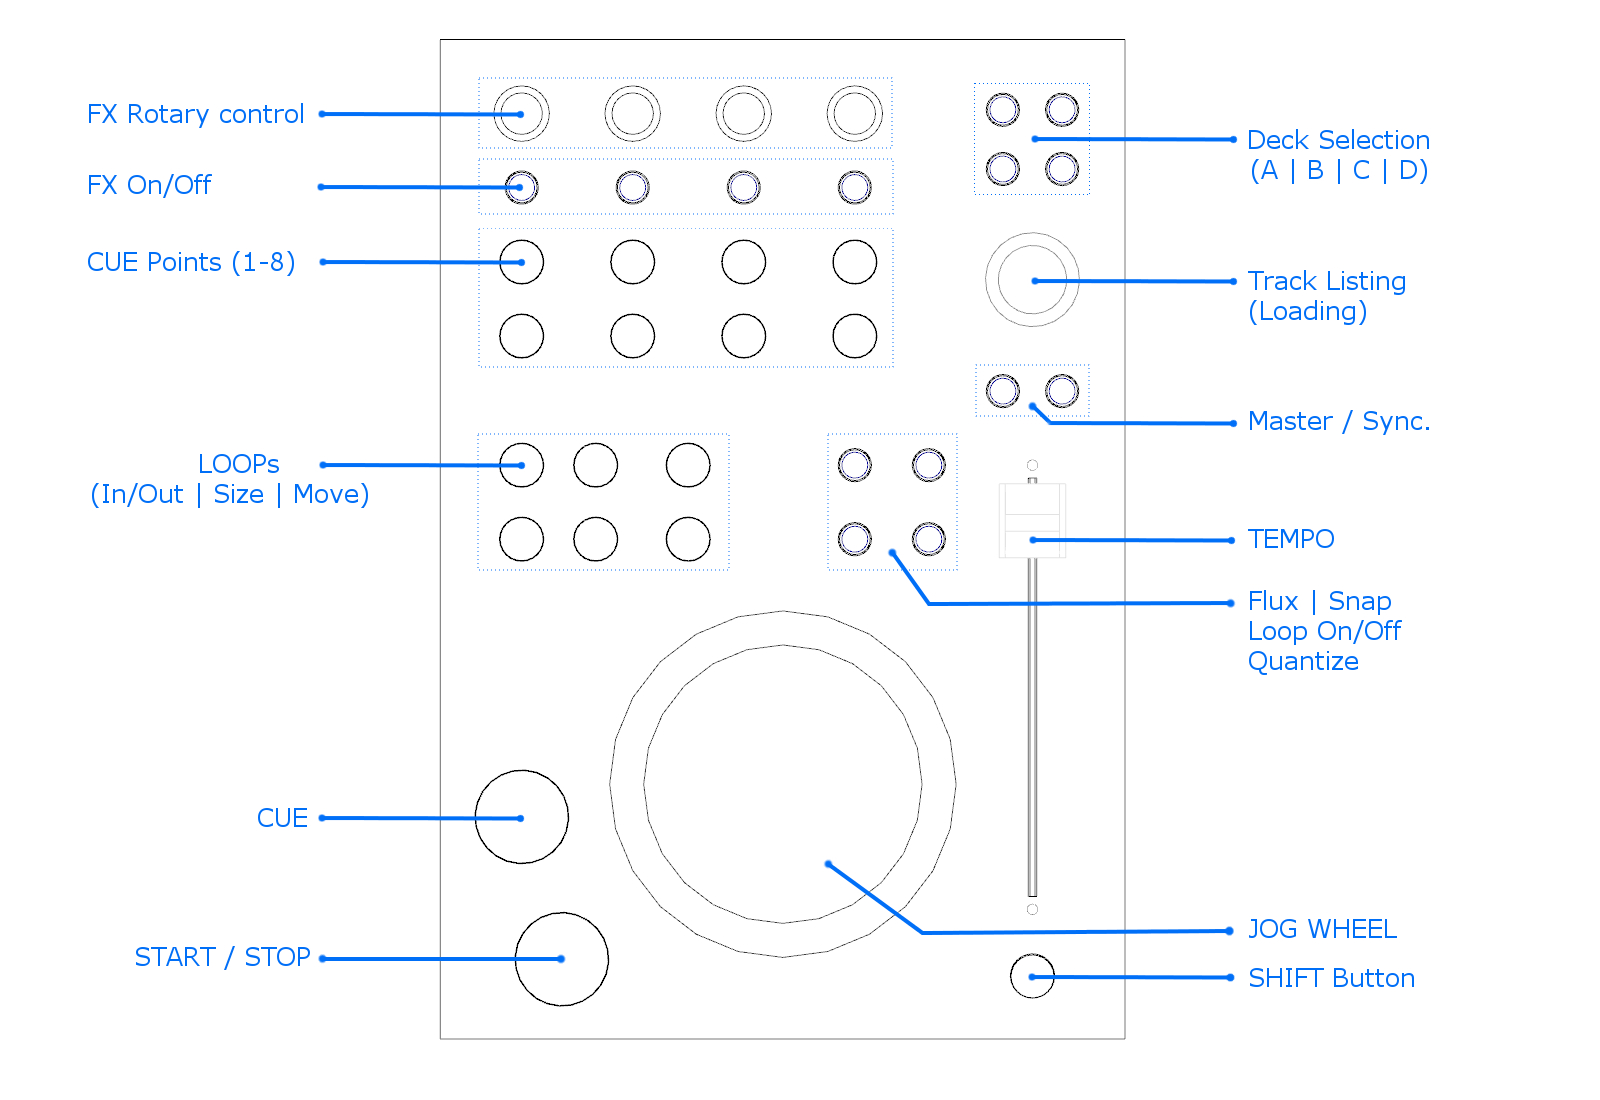
Design
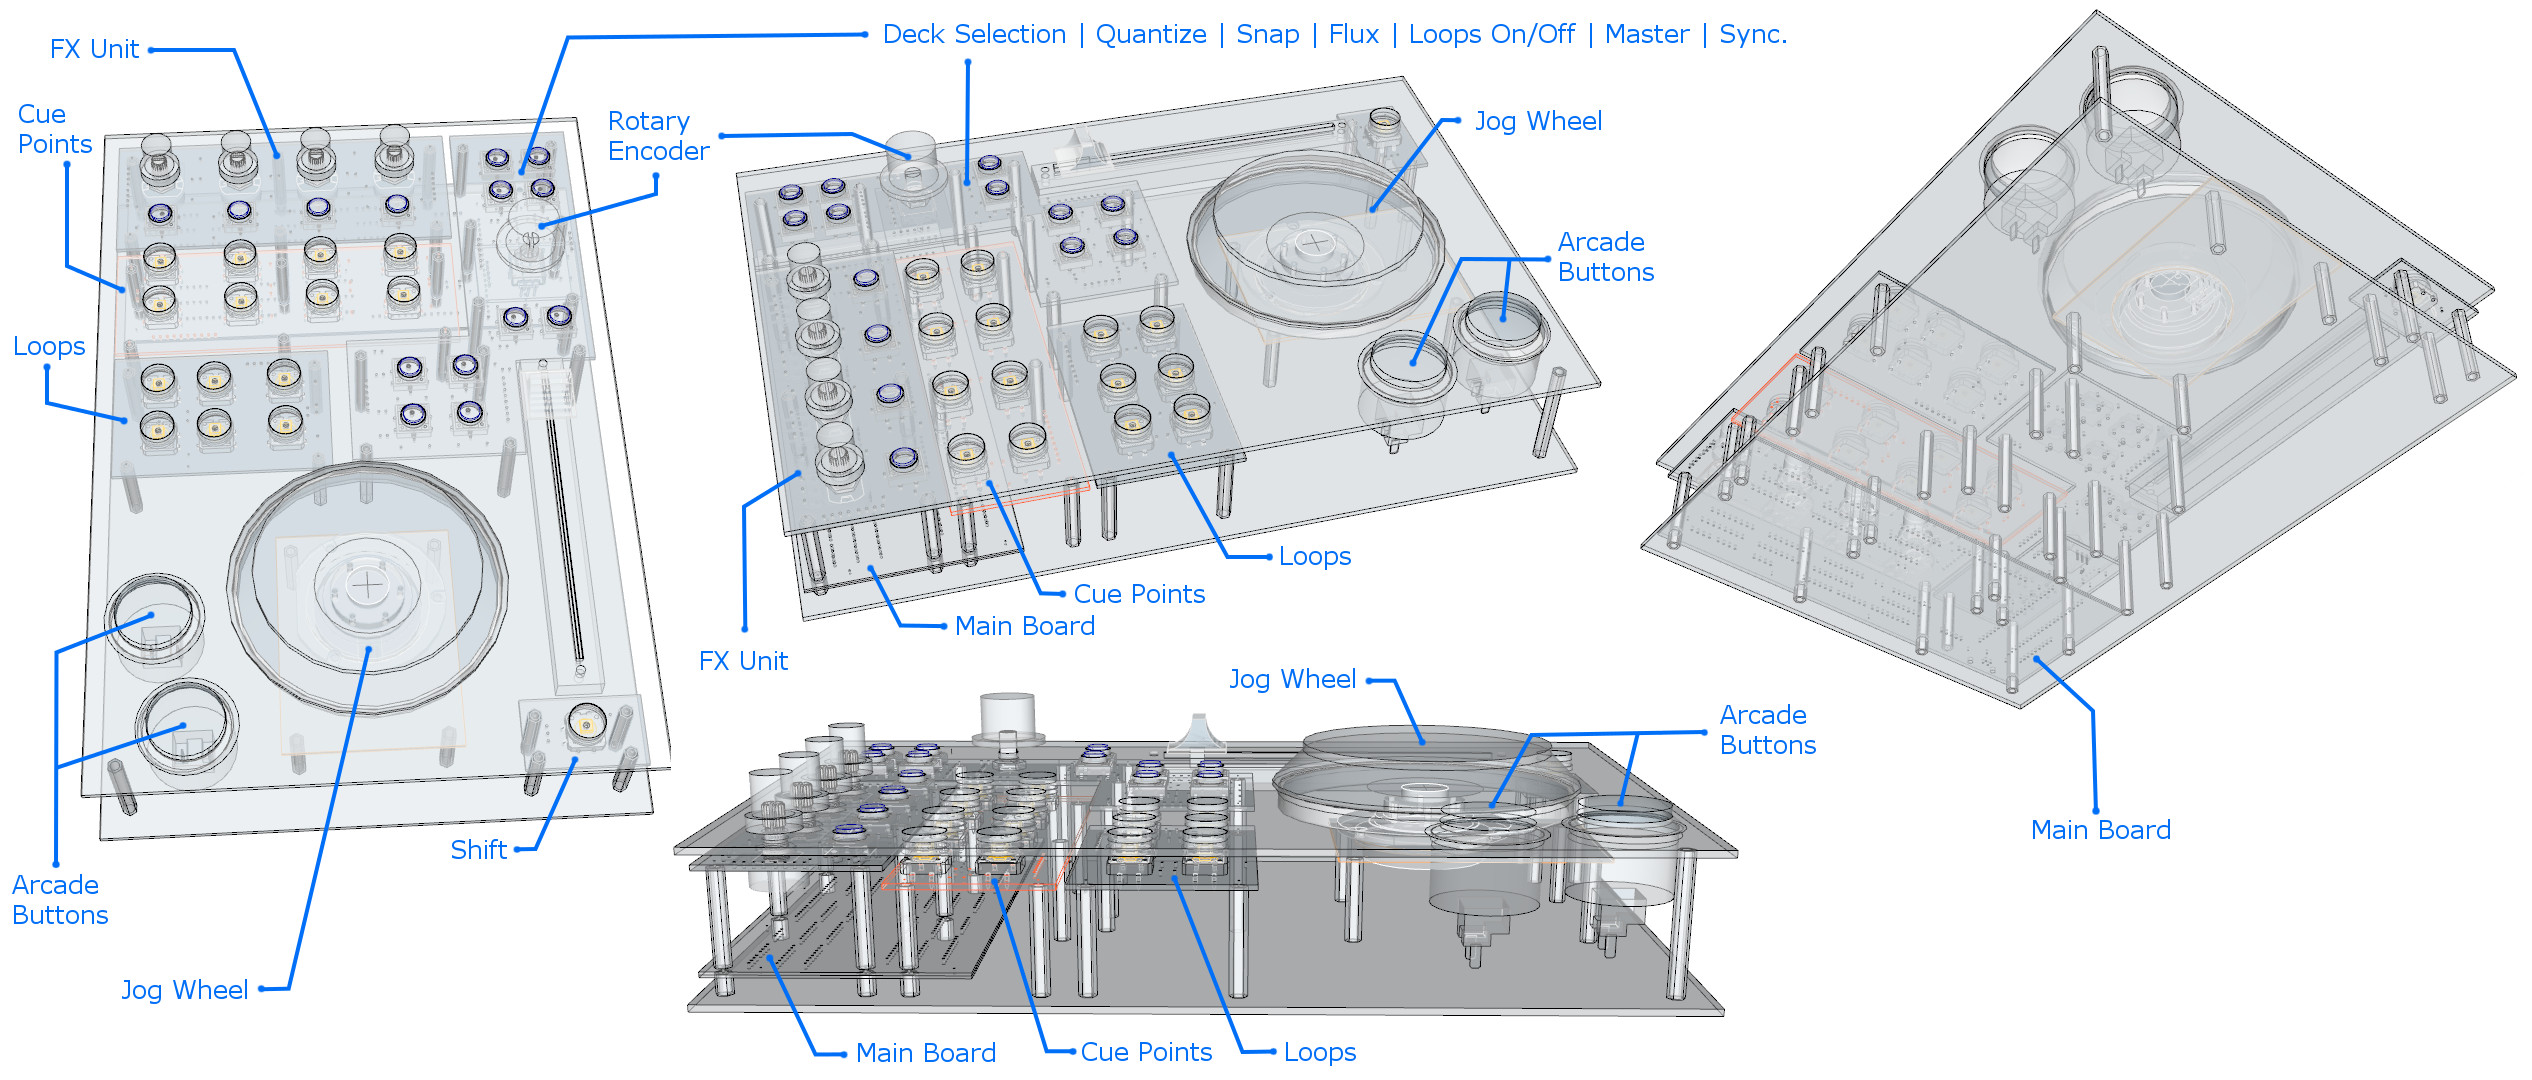
Overall design was made in Google SketchUp to get overview of placement of all control items and to be able design PCBs and also to manufacture the front panel accordingly. Because it's a very first prototype I didn't speculate about the complicated manufacture of the case and just decide to put the all items and electronic between two plates of acrylic (plexiglass) plates of 2mm thickness. Thickness of 2mm for top panel is for sure not enough in order to avoid the bending during the buttons pushing but my design holds the all items (boards with the items) on the stand offs attached to the bottom so it's not so big issue. Exceptions are boards for arcade buttons for START and STOP function (and Tempo slider) so around these buttons are installed few additional hexa stand-offs to reinforce the top panel in this area.
Hardware
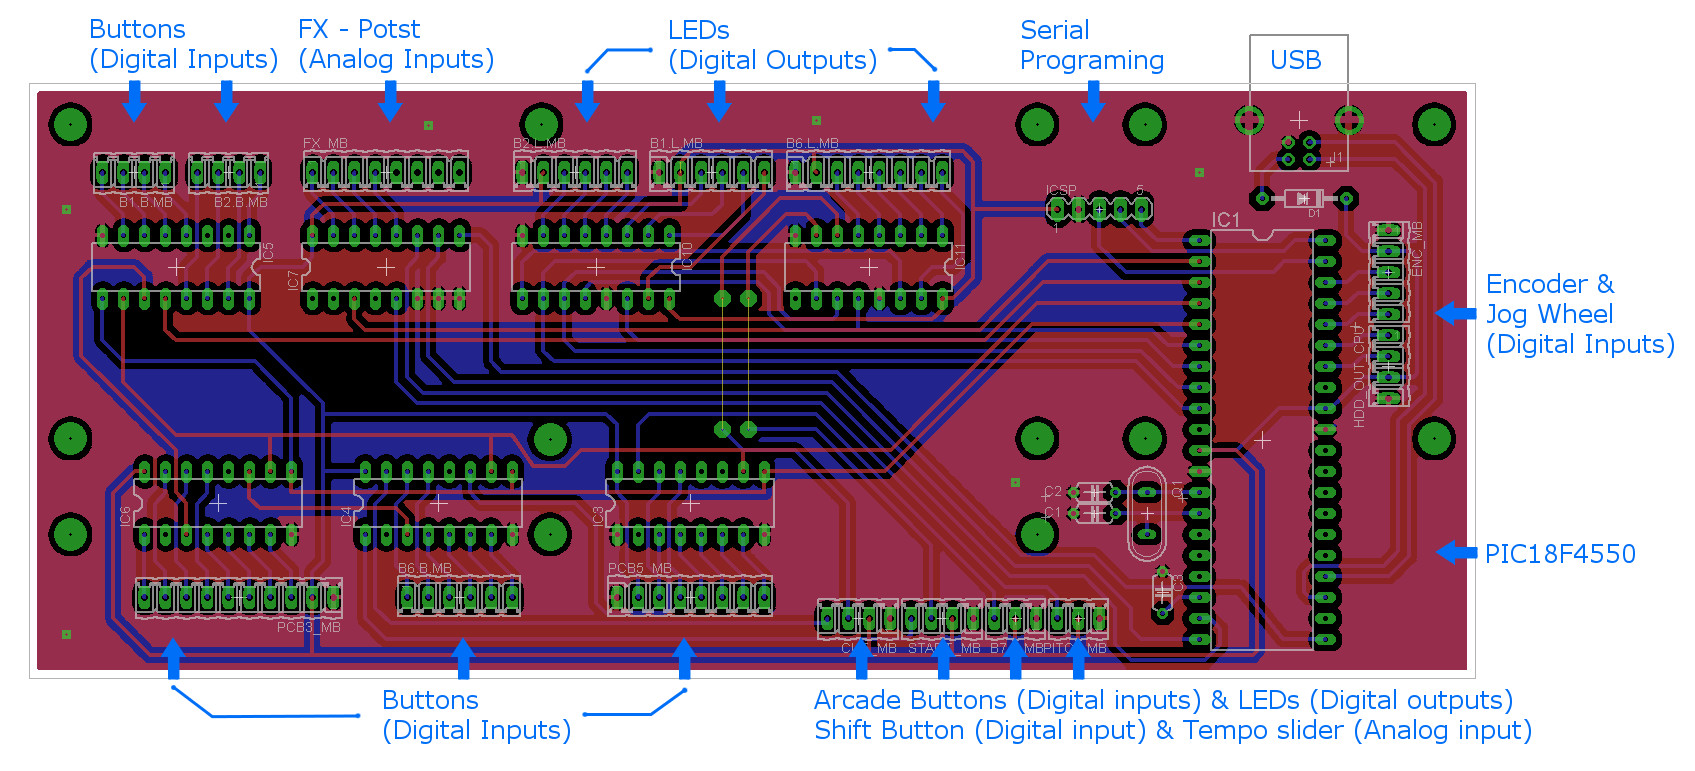
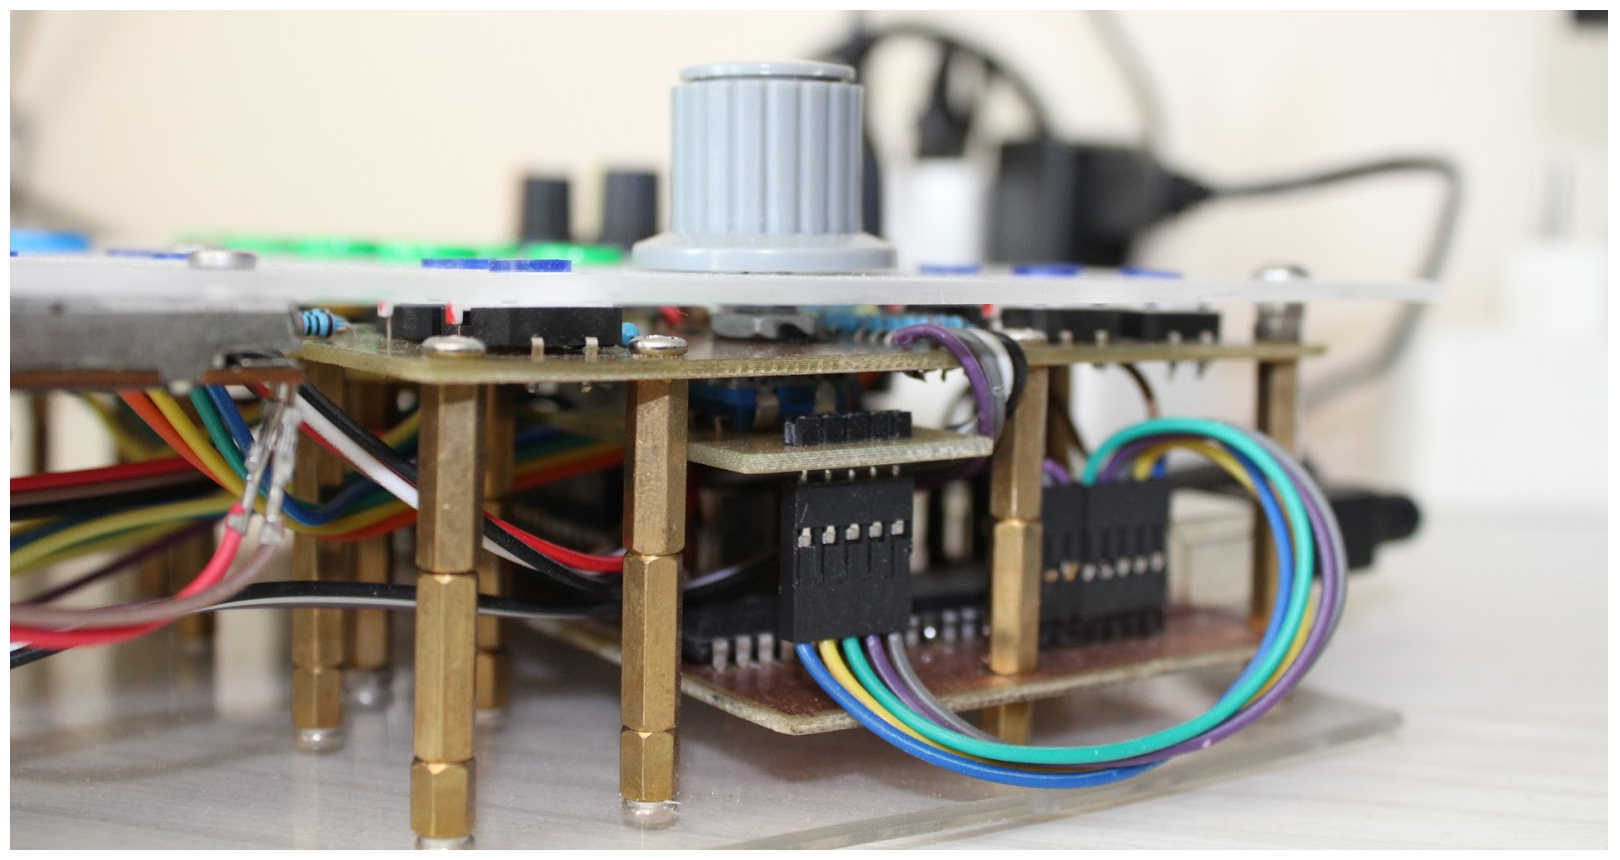
Because different types of interface items have also different dimensions (especially the height ) MIDI controller consist of several different PCBs according to the type of control items on it (push buttons, potentiometers, arcade buttons..) mounted on the stand-offs of various heights in order to achieve the same plane for the top panel. Behind of all control boards is one main board with micro-controller (Microchip Corporation - PIC18F4550). Main board is responsible for multiplexing and reading the incoming and out-coming signals from and to control boards and also communication with computer via USB connection (sending & receiving MIDI data packets).
Main-Board
For logic and processing of all signals and MIDI data communication with the computer (in both directions) is responsible 8 bit mid range family micro-controller PIC18F4550 with USB connection ability. Main-board consist of the micro-controller and several 8-bit static shift registers (4021) for the processing of button signals, serial to parallel shift registers (74HC959) for the LEDs and one 8-channel analog multiplexer/demultiplexer (4051) for analog inputs of FX pots and Tempo slider.
FX Control
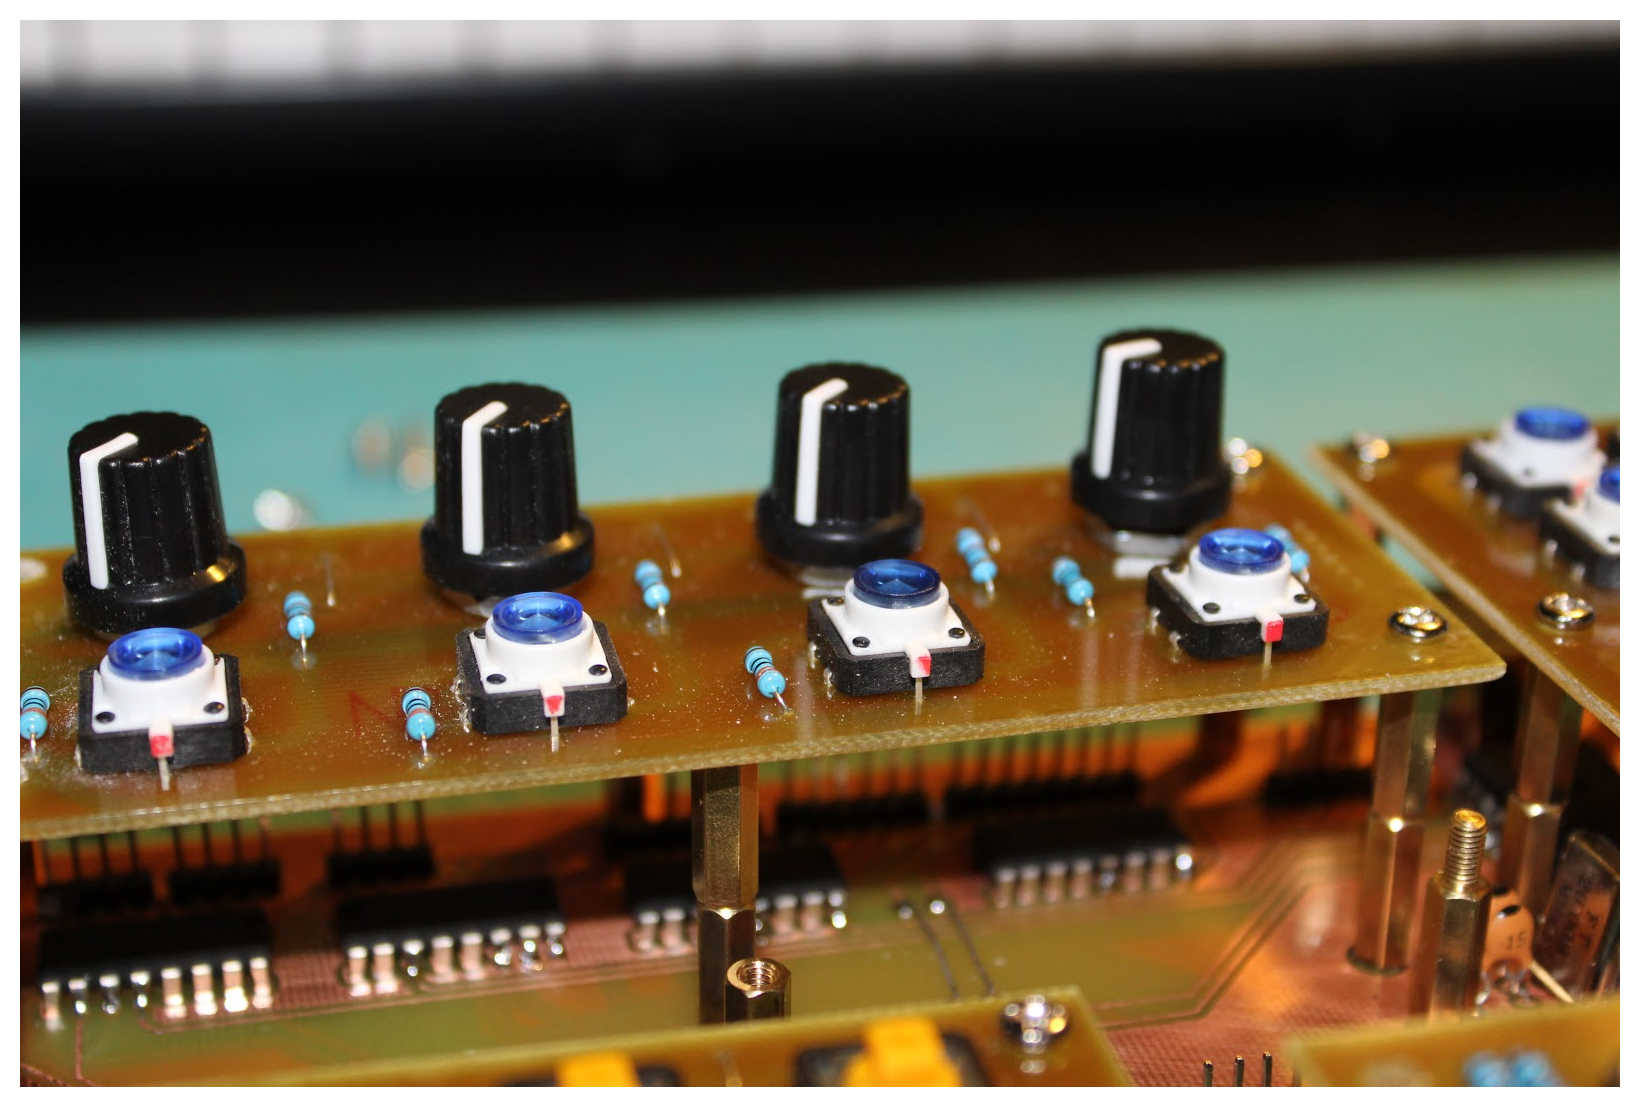
FX control board contains 4 potentiometers and equally 4 push buttons with back-lit blue LEDs for control TRAKTOR FX Units. Potentiometers works as voltage divider. Divided analog signals are multiplexed to one by multiplexer chip 4051 on the Main-board and than signal goes as input for micro-controller ADC unit (Analog to Digital Converter).
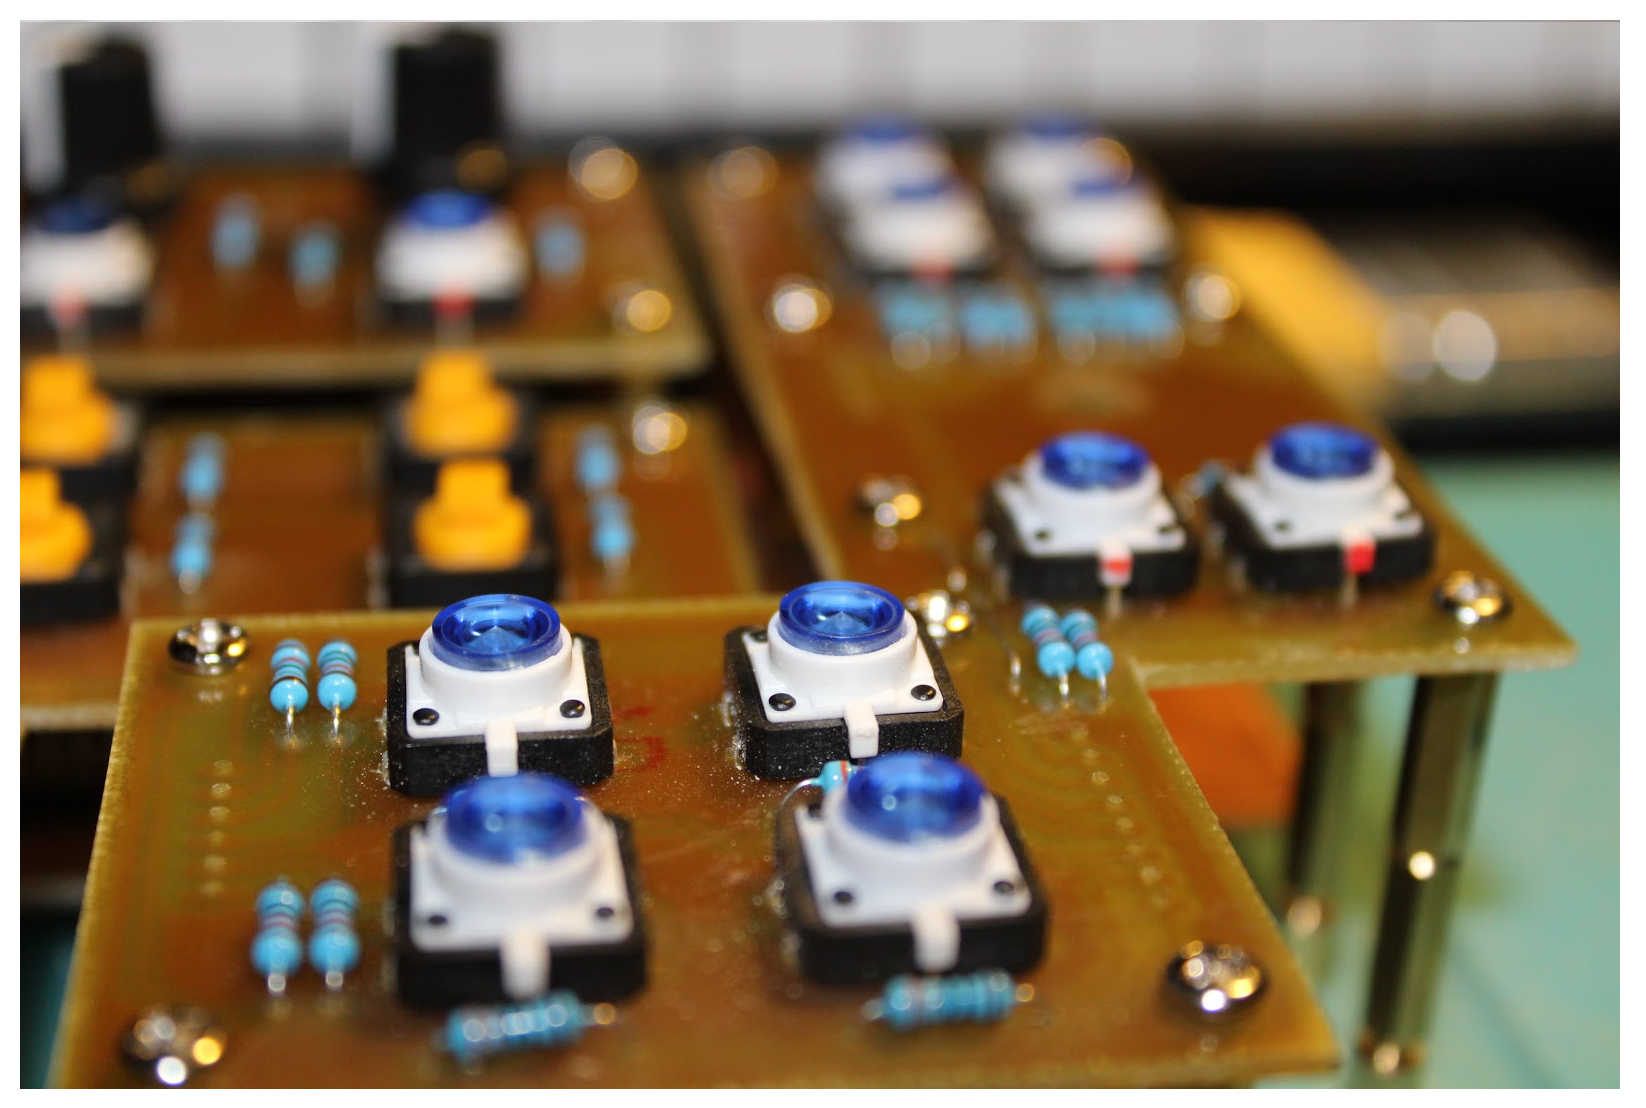
CUE POINTS
Control board for Cue points is simple board with 8 tactile buttons with pull-up resistors (and rounded caps on it) without back-lit. Signals from buttons are processed by 4021 shift registers and PIC 18F4550 micro-controller on the Main-board.
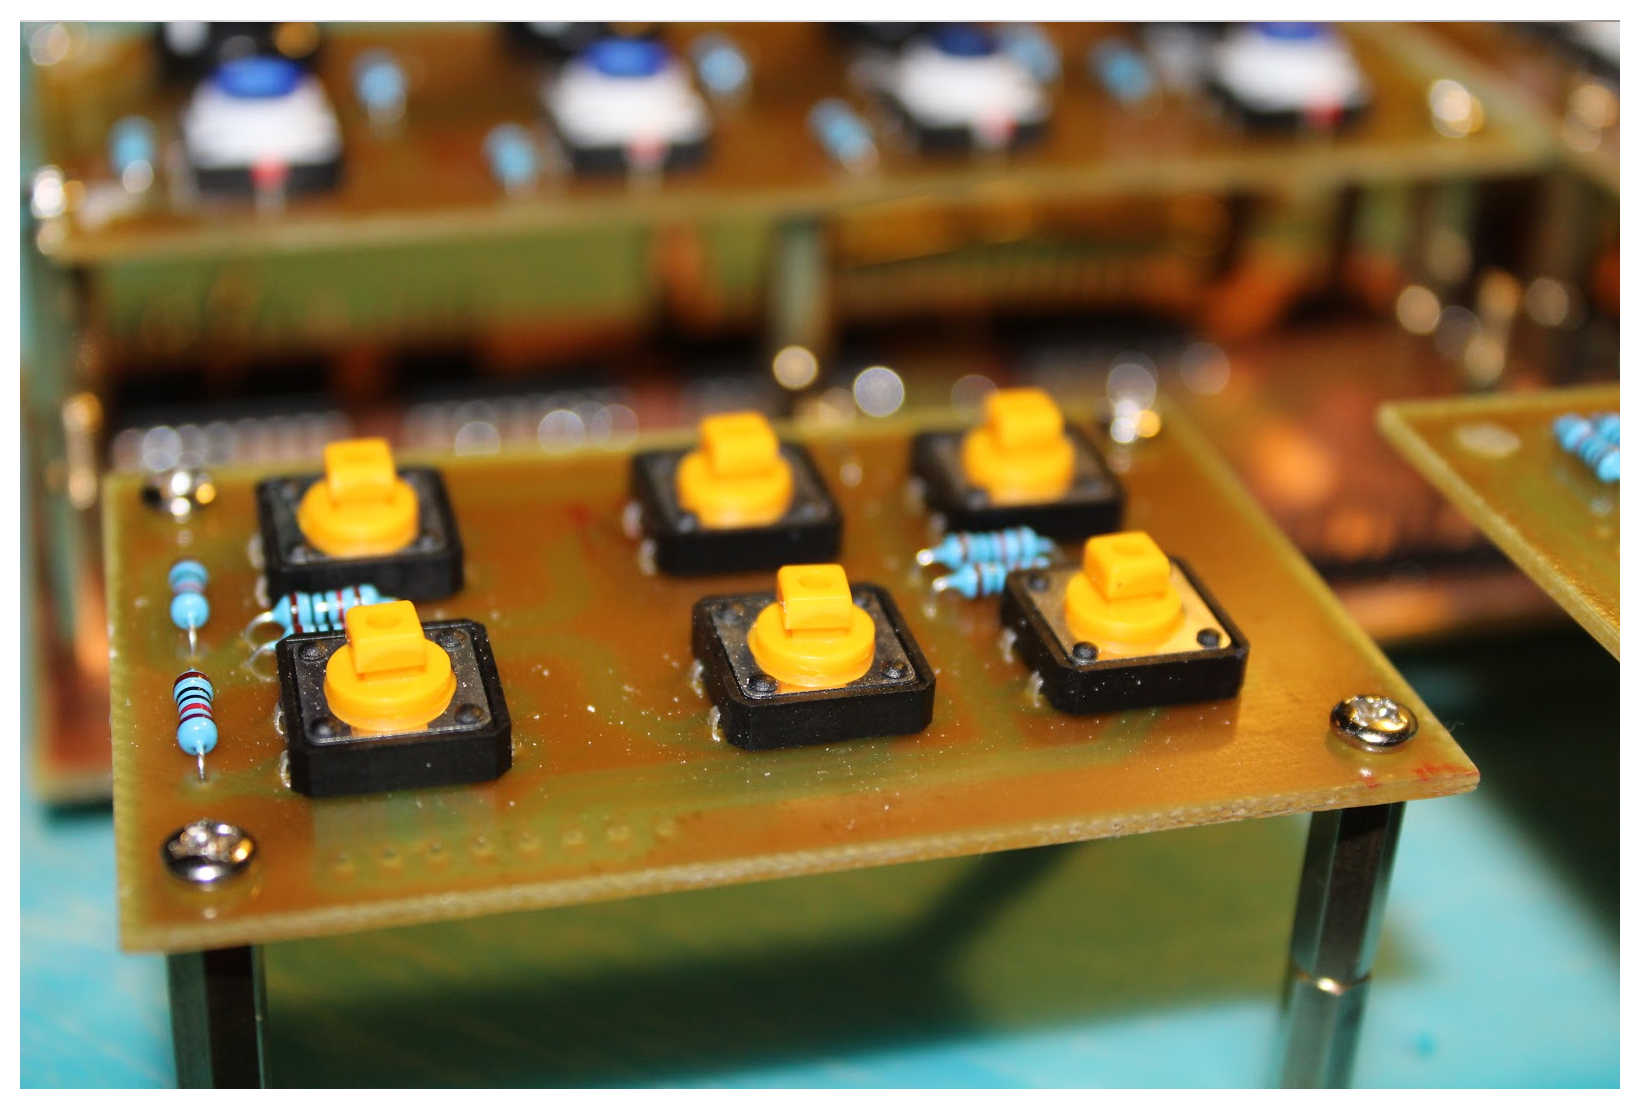
LOOPS
The same design as Cue points controller - just six tactile push buttons without back-lit.
START/STOP & CUE
Two transparent Arcade buttons with blue LEDs. Because current consumption of four LEDs is too high and exceeds the current limit for one micro-controller output there was necessary to use transistor as switching element. Both button PCBs have the same design with 4 blue LEDs below the button.

JOG WHEEL
For deck "platter" control was used solution with this Old HDD modification. I've find out one old HDD a bit different than others that I had at home. One where was possible to dismantle the motor itself without useless construction frame parts so it better fit to the layout and doesn't waste the space around. According to its dimensions I've designed the PCB with operational amps for transformation of low voltage output from coils to readable signal impulses for micro-controller. Transformed signals are connected directly to the micro-controller on Main-board without usage of shift register.
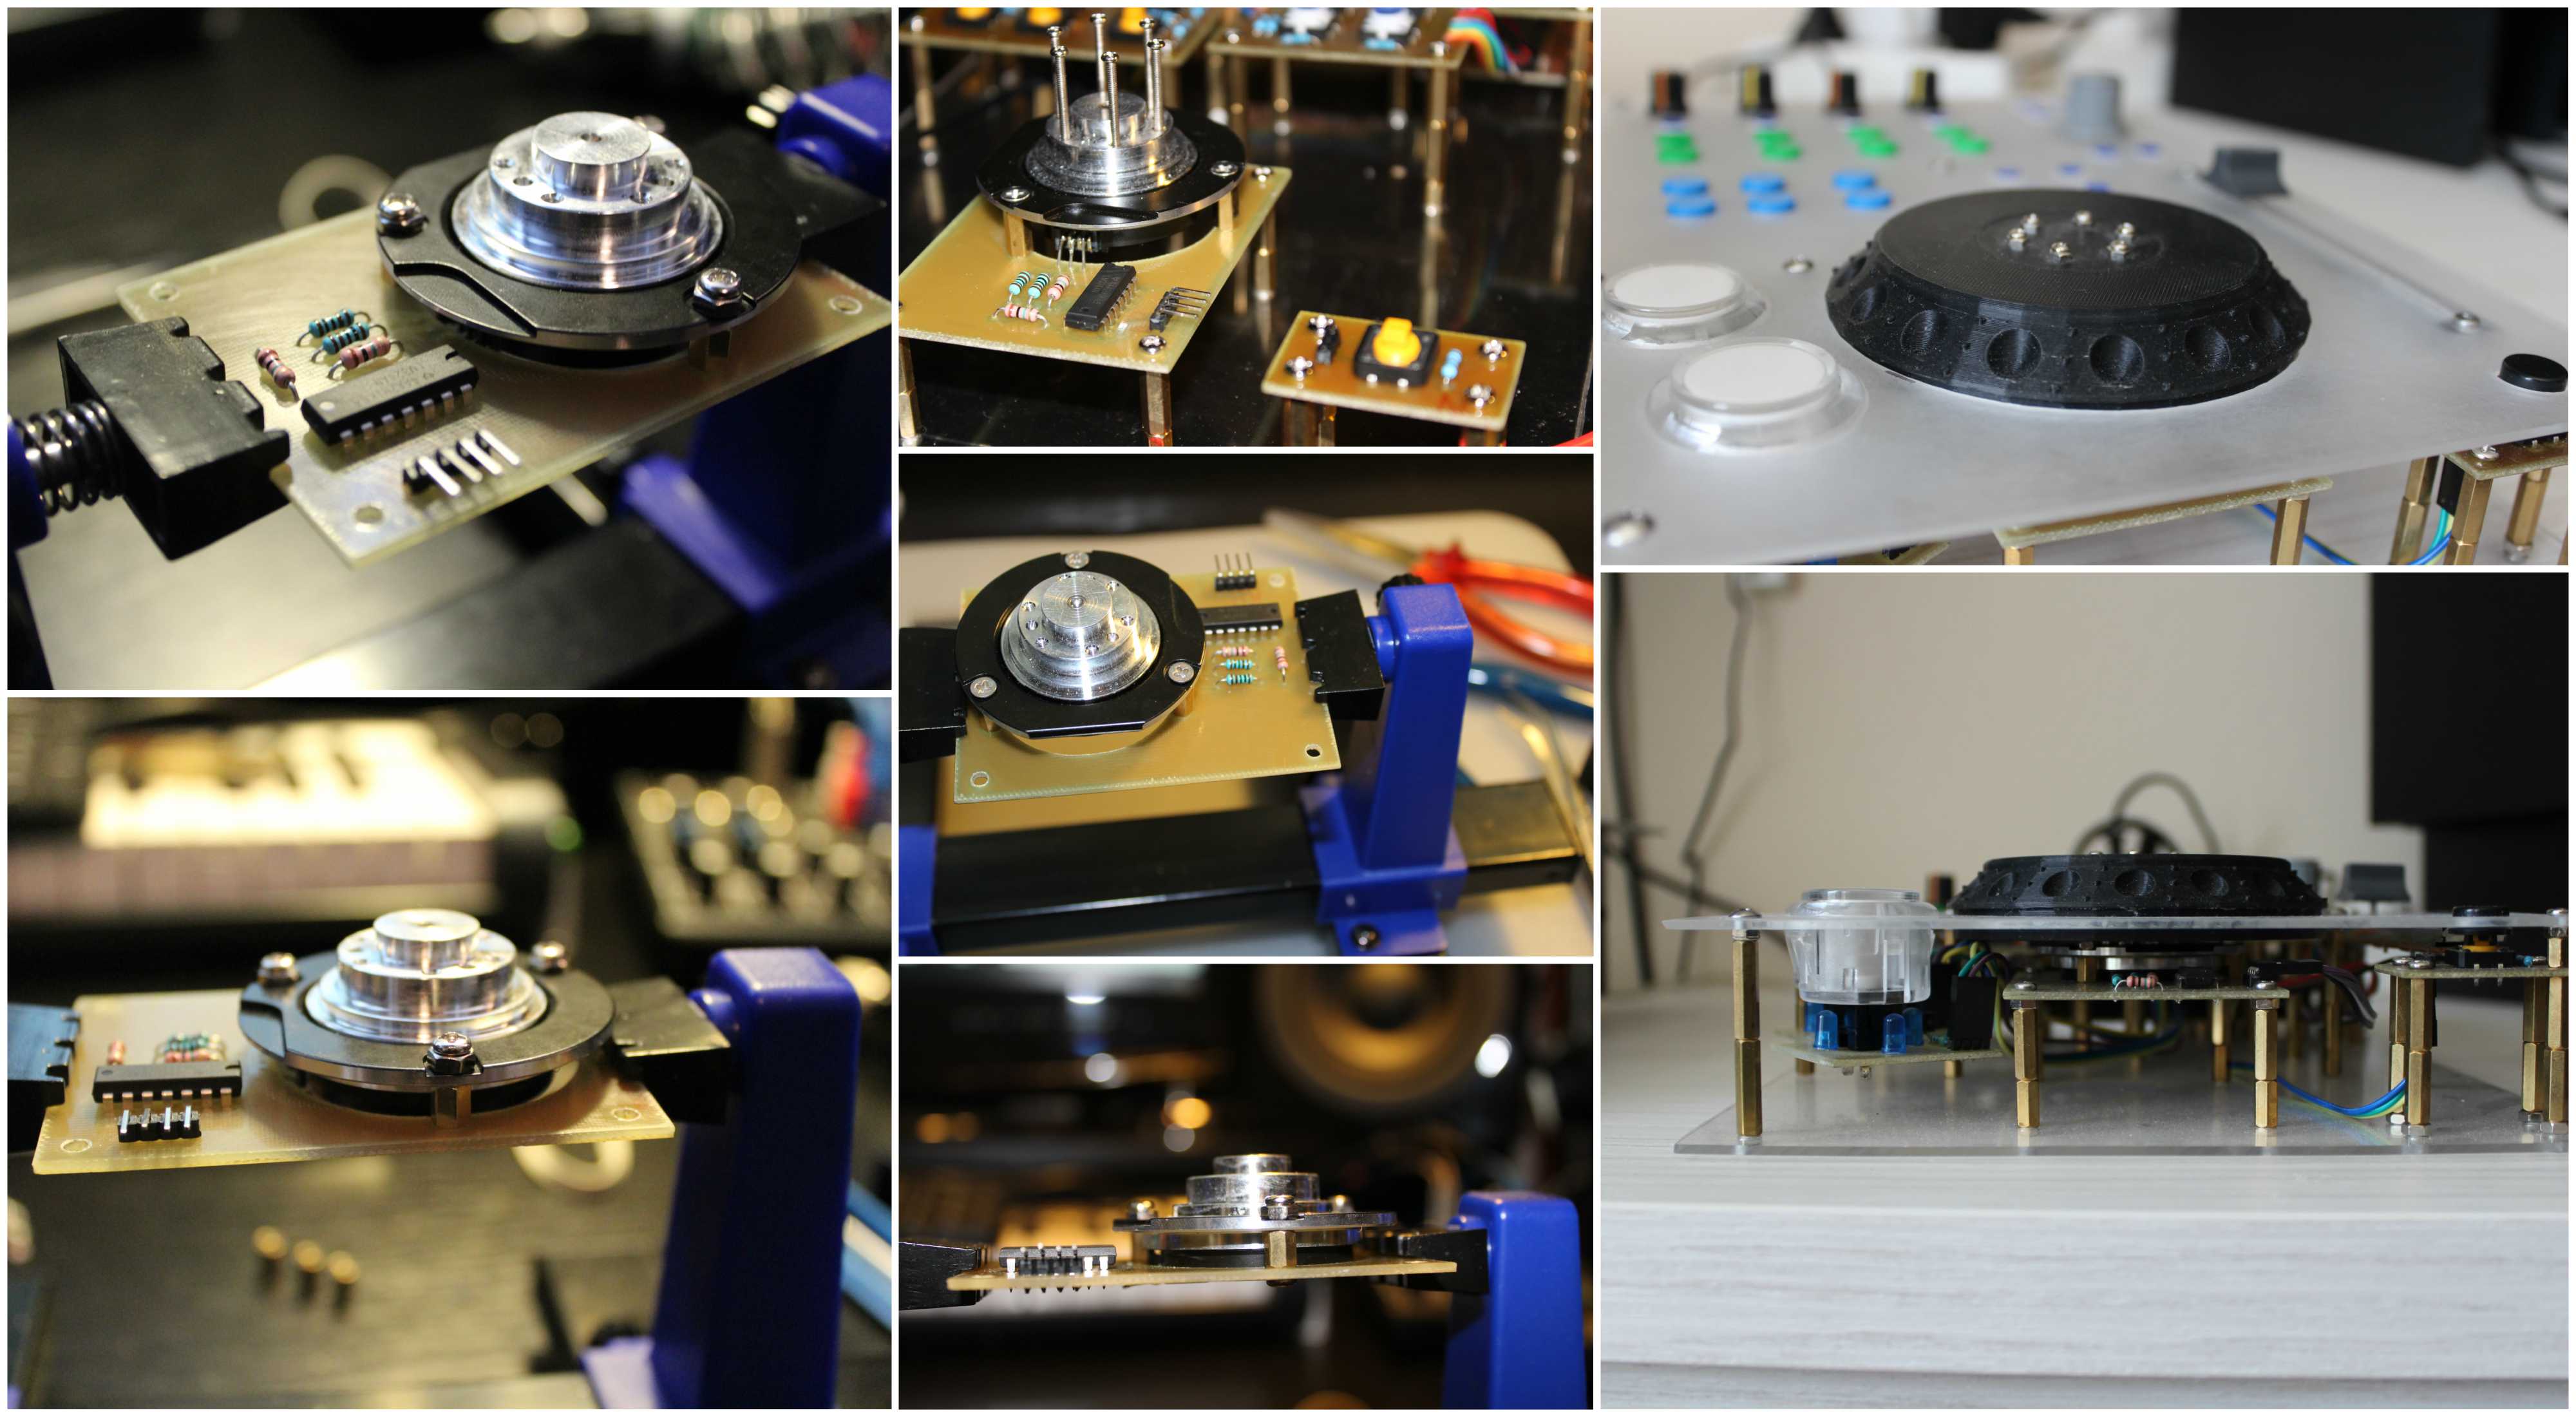
ROTARY KNOB
Used for track listing but can be very useful for some other MIDI functions as well. Depends on the creativity of MIDI mapping author. Encoder has own PCB with pull-up resistors and connector for direct connection with micro-controller on the Main-board.
OTHER Functions
L shape board with push buttons with blue back-lit LEDs. There is control of decks selection and other TRAKTOR functions like quantize, snap, flux, master, sync, loop on/off.
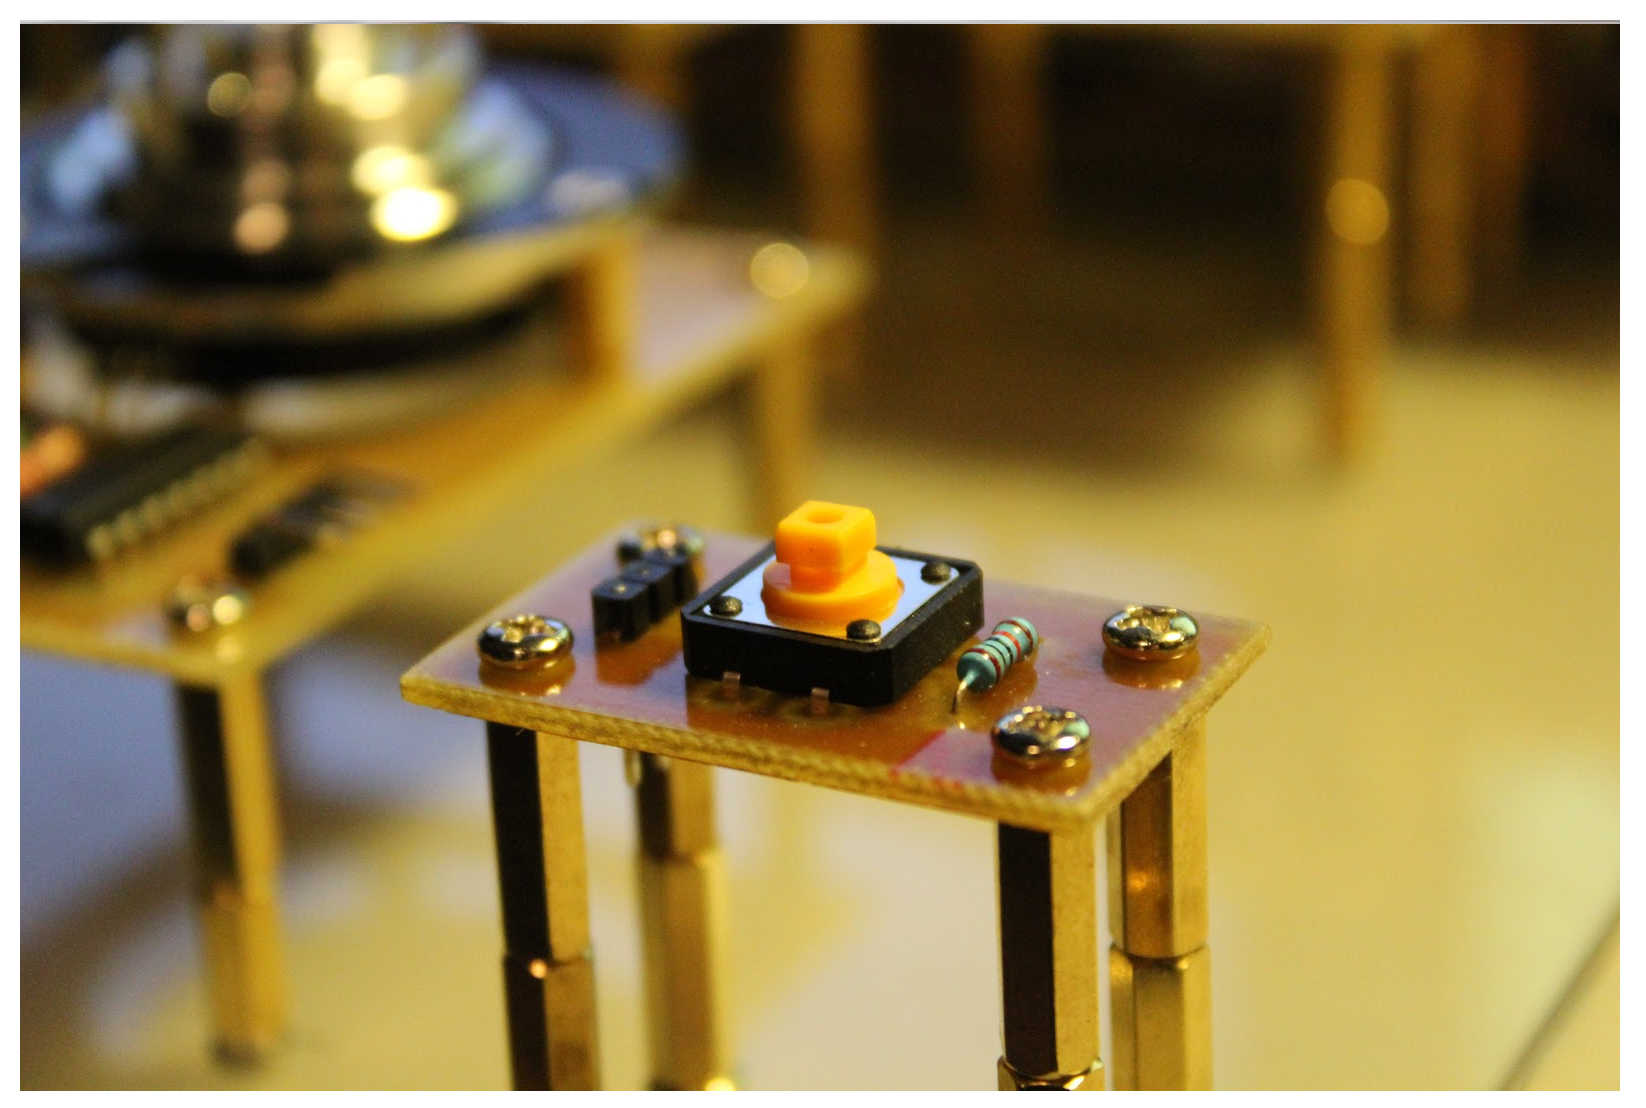
SHIFT Button
Small board with only one tactile button without back-lit.
Firmware
The basis of the controller for signals processing and sending MIDI data via USB to the computer is PIC micro-controller 18F4550 by Microchip corporation. For firmware development I use MPLAB X IDE 3.40. and basic C compiler for 8bit micro-controllers family XC8. For debugging and programming the PIC chip was used PICKIT3 programmer. USB MIDI interface is established by Microchip Libraries for Applications for USB MIDI communications. Related files were pulled out from the libraries and included to the project in order to achieve project portability in the scope of one folder so there is no need to have MLA installed. Download of the MPLAB project is available in download section below.
Downloads
![]() Eagle CAD File (schematic + PCB)
Eagle CAD File (schematic + PCB)